The Village is calling it quits.
Due to lack of interest from readers and the crazy lives of the panelists we have mutually decided to close up shop. We've had a good run, but the time has come to end regular posting on The Village. We will leave the blog up so that you can access previous posts - hopefully the blog will still be here if you need something. Thanks for reading and commenting, we hope that we've helped you in your journey as a mother.
Special thanks also to Delia Randall who originally came up with the idea for the blog and to all other previous panelists who have made The Village great.
Tannie Datwyler
Megan Izatt
Laura Wampler
Alyssa Harper
Lisa Mortensen

Monday, September 5, 2011

Friday, September 2, 2011
How to Take Your Own Photos: Part II
For a great intro into basic, portrait taking tips, click HERE for our previous Village discussion.
Okay, now let's talk Photoshop. Last time I got some great questions about photo editing. We all know the pros do it, and great post-process editing sprinkles that little bit of magic on your photos to take them from good to holy-cow-phenominal. The most common feedback I get from friends without Photoshop is, "it's too expensive." Granted there is free photo editing software out there. Gimp. Picasa. They're all good for basic edits, (I would try out one of them before paying for licensed software) but I still like Photoshop best. It's the cream of the crop. Love it for all-purpose editing.
There are two types of Photoshop:
Moving on.
The most common question I get from people WITH Photoshop is, "I have it, but I don't even know where to start." Touche, my friends. There are A LOT of bells and whistles in Photoshop. Here's a breakdown for my basic, home-photo edits. It's two steps. Seriously.
EXPOSURE: If you have stinkin' amazing equipment and perfect models that sit still, maybe you can get perfect shots with perfect exposures, but if you're like me and shoot in AUTO a lot of the time (because I'm chasing toddlers around with my camera) your camera will make mistakes now and then. You can fix exposure somewhat in Photoshop. Go to Image>Adjustments>Exposure and fiddle with the bars.
ACTIONS: These save my life. Not even kidding. They are so fast. So convenient. So amazing. Actions are pre-recorded edits. Tens, hundreds, thousands of repetitive edits can be saved in "Actions." You just hit the play button, and Photoshop runs every step in the Action automatically. Awesome! You can make your own, but I recommend downloading other people's Actions. Here's a good little video to wet your feet in...(click HERE to go straight to youtube).
My absolute favorite action creator is MCP Actions. Jodi Friedman, creator, put together all these Action products that are absolutely jaw-dropping awesome. A good selection of them are free too.

Here's a picture I took of my boy just this morning. He had his cereal bowl on the floor, because eating at the table is SO YESTERDAY, MOM. *eye roll* Toddlers, seriously. Anyway, I ran a quick Action on it (MCP Mini Fusion Set is FREE from the MCP action site, click HERE to download).

That's it. One click Action. So easy. Just what a busy mother needs.
MCP also has Actions you can pay for. They're SO worth it. To date, I've never taken my kids to a studio to have their monthly milestone pictures taken. I take them all myself and do my own edits. Saves so much money, and I actually get around to DOING milestone pictures. Never would, if I had to leave the house. I'm that lazy.
My favorite Action set from MCP is their Fusion Mix (not to be confused with the free MINI fusion set). It is absolutely phenomenal. A little pricey, but totally worth every penny it in my mind. These pictures took all of 5 minutes to edit. Time saving is HUGE for me, especially with the bulk of pictures I take.

So, I'm totally curious. How many of our awesome readers edit their photos using some sort of software (both free and licensed)? Have you heard of editing via Actions before? If you have a favorite website to download actions from, PLEASE SHARE! (There are a lot of them out there.) During our last discussion, one of our readers suggested the The Coffee Shop for a great set of free actions. And as always, if you have any questions, shoot us a comment! I or any of our fabulous readers will make sure to answer them!
Okay, now let's talk Photoshop. Last time I got some great questions about photo editing. We all know the pros do it, and great post-process editing sprinkles that little bit of magic on your photos to take them from good to holy-cow-phenominal. The most common feedback I get from friends without Photoshop is, "it's too expensive." Granted there is free photo editing software out there. Gimp. Picasa. They're all good for basic edits, (I would try out one of them before paying for licensed software) but I still like Photoshop best. It's the cream of the crop. Love it for all-purpose editing.
There are two types of Photoshop:
- Photoshop CS series (most recent is CS5) which is the full-on, everything included, beefed up version of Photoshop that has everything a professional photographer would ever want to use (relatively speaking) to edit the most minor details.
- Photoshop Elements (most recent edition is Elements 9) is a slimmed down version of the CS series. It still has absolutely everything an amateur photographer would need. It's wonderful. I recommend it. You can get Elements 7 on Ebay for about $45.
Moving on.
The most common question I get from people WITH Photoshop is, "I have it, but I don't even know where to start." Touche, my friends. There are A LOT of bells and whistles in Photoshop. Here's a breakdown for my basic, home-photo edits. It's two steps. Seriously.
EXPOSURE: If you have stinkin' amazing equipment and perfect models that sit still, maybe you can get perfect shots with perfect exposures, but if you're like me and shoot in AUTO a lot of the time (because I'm chasing toddlers around with my camera) your camera will make mistakes now and then. You can fix exposure somewhat in Photoshop. Go to Image>Adjustments>Exposure and fiddle with the bars.
ACTIONS: These save my life. Not even kidding. They are so fast. So convenient. So amazing. Actions are pre-recorded edits. Tens, hundreds, thousands of repetitive edits can be saved in "Actions." You just hit the play button, and Photoshop runs every step in the Action automatically. Awesome! You can make your own, but I recommend downloading other people's Actions. Here's a good little video to wet your feet in...(click HERE to go straight to youtube).
My absolute favorite action creator is MCP Actions. Jodi Friedman, creator, put together all these Action products that are absolutely jaw-dropping awesome. A good selection of them are free too.

Here's a picture I took of my boy just this morning. He had his cereal bowl on the floor, because eating at the table is SO YESTERDAY, MOM. *eye roll* Toddlers, seriously. Anyway, I ran a quick Action on it (MCP Mini Fusion Set is FREE from the MCP action site, click HERE to download).

That's it. One click Action. So easy. Just what a busy mother needs.
MCP also has Actions you can pay for. They're SO worth it. To date, I've never taken my kids to a studio to have their monthly milestone pictures taken. I take them all myself and do my own edits. Saves so much money, and I actually get around to DOING milestone pictures. Never would, if I had to leave the house. I'm that lazy.
My favorite Action set from MCP is their Fusion Mix (not to be confused with the free MINI fusion set). It is absolutely phenomenal. A little pricey, but totally worth every penny it in my mind. These pictures took all of 5 minutes to edit. Time saving is HUGE for me, especially with the bulk of pictures I take.

So, I'm totally curious. How many of our awesome readers edit their photos using some sort of software (both free and licensed)? Have you heard of editing via Actions before? If you have a favorite website to download actions from, PLEASE SHARE! (There are a lot of them out there.) During our last discussion, one of our readers suggested the The Coffee Shop for a great set of free actions. And as always, if you have any questions, shoot us a comment! I or any of our fabulous readers will make sure to answer them!
-Alyssa
Thursday, September 1, 2011
Waste or Want: #15: Baby Bullet (or other similar food processor)

An appliance to help make baby food and if you get a regular bullet, or something similar, you can make smoothies, sauces, grate cheese, and a number of other things as well!
Average Cost: Anywhere from $30 to over $130
On the One Hand:
The bullet, or something similar, is great at pureeing, blending, chopping, mixing, and other food prep. Also, the jars are microwave safe, so no having to switch containers when heating things up! It's also smaller than a blender so takes up less counter space.
On the Other Hand:
For baby food, a hand mill works great and is a fraction of the cost. Also, a blender can do quite a few things that a bullet can and you can find a decent one for around $30 or less.
I've been considering getting a bullet for several months. I have a hand mill and while I don't mind using, if I'm going to make several kinds of food it kind of wears my arm out! Also, my blender is wearing out and doesn't puree things as smooth as I want. So, what's your vote?
Magic Bullet (or something similar)
Waste or Want?
(and don't forget to tell us why!)
Wednesday, August 31, 2011
A Little Plugged Up
This has to be a picture-less post, because I simply could not find a picture appropriate to this topic...
Fairly explicit post below - so be forewarned if you get squeamish about nursing.
Mastitis and Plugged Milk Ducts - the dreaded duo of nursing mothers.
I have never had Mastitis (yes, I KNOW I'm lucky - I'm sorry if you've ever had it, from what I understand it is dreadful). However, I've had plenty of clogged milk ducts. Especially in the last 3 weeks, and they can be VERY painful.
With all my kids I remain clog free for the first 4-6 months of nursing. Probably due to the fact that they are nursing more frequently and they still nurse through the night. But those plugged ducts always rear their ugly heads. Luckily, they usually ease up and go away around 9 months (at least for me).
This time has been no exception. I started getting my plugged ducts about a month ago. They have escalated BADLY this time to the point where I have been getting them every couple days, and some times on a daily basis. It's ridiculous friends...
This is most likely due to the fact that my baby is now sleeping through the night and I have an inordinate amount of milk at 3:00 or 4:00 AM. I have to get up and pump out a couple of ounces just to ease up the pressure and be able to go back to sleep. I'm hoping I'll stop producing in the night EVENTUALLY. SIGH.
In any case, in my desperation I have found some tricks that have helped me. So here we go...
1 - Make sure your bra/shirts are not too tight. Sometimes when I have a bad clog I'll take my bra off at around 8:00 after we are all winding down. That gives me a few hours at night without it pressing on my clogs and sometimes this is all I need to get it unstuck.
2 - Nurse the sore side FIRST. The baby's suck is stronger when he/she is hungry. If you feel like your baby didn't get all the milk out - put your pump on for just 1-2 minutes to make sure everything is cleared out.
3 - Dangle nurse. This is a weird trick and is new to me this time. The suggestion I read recommended laying your baby on the floor and kneeling over the top so as to use gravity to force the clog out. I found it was just as effective to sit cross legged with the baby on my lap and to lean over. This REALLY helped though. A couple of sessions of dangle nursing are sometimes all it takes to get the clog out.
4 - Apply heat. Take a warm shower and try to massage where it is sore (I know, it hurts). Or heat up a bean bag about 5 minutes before you feed the baby and apply it to the sore side. Then massage for about 30 seconds before you start feeding. This is a life saver.
5 - Garlic. I've read that you should eat a lot of it, though that's not the trick I've tried. My SIL gave me the advice of putting a raw garlic clove in my bra. This works great for me. I find a HUGE garlic clove, peel it and set it right next to the clog. For some reason this works - I swear.
6 - To prevent future clogs take Lecithin. This is a LARGE capsule that you can find in pretty much any store that sells medicine. The bottles aren't too expensive and they come with 100 capsules. Kelly mom recommends taking 3-4 capsules per day until you go a few weeks without clogs, then you can reduce it by one capsule, eventually working down to one. There are no ill effects for babies or nursing mothers.
If I use these tricks I can generally get a plugged milk duct cleared up in under 24 hours, though I've had some nasty ones that lasted for DAYS (maybe even a week).
For other suggestions see the Kelly Mom website.
Now for your input...
What do you do for plugged milk ducts?
What do you do for mastitis?
Share your horror/success stories!
And one more thing... how do I get rid of all the milk I'm making in the night????
Fairly explicit post below - so be forewarned if you get squeamish about nursing.
Mastitis and Plugged Milk Ducts - the dreaded duo of nursing mothers.
I have never had Mastitis (yes, I KNOW I'm lucky - I'm sorry if you've ever had it, from what I understand it is dreadful). However, I've had plenty of clogged milk ducts. Especially in the last 3 weeks, and they can be VERY painful.
With all my kids I remain clog free for the first 4-6 months of nursing. Probably due to the fact that they are nursing more frequently and they still nurse through the night. But those plugged ducts always rear their ugly heads. Luckily, they usually ease up and go away around 9 months (at least for me).
This time has been no exception. I started getting my plugged ducts about a month ago. They have escalated BADLY this time to the point where I have been getting them every couple days, and some times on a daily basis. It's ridiculous friends...
This is most likely due to the fact that my baby is now sleeping through the night and I have an inordinate amount of milk at 3:00 or 4:00 AM. I have to get up and pump out a couple of ounces just to ease up the pressure and be able to go back to sleep. I'm hoping I'll stop producing in the night EVENTUALLY. SIGH.
In any case, in my desperation I have found some tricks that have helped me. So here we go...
1 - Make sure your bra/shirts are not too tight. Sometimes when I have a bad clog I'll take my bra off at around 8:00 after we are all winding down. That gives me a few hours at night without it pressing on my clogs and sometimes this is all I need to get it unstuck.
2 - Nurse the sore side FIRST. The baby's suck is stronger when he/she is hungry. If you feel like your baby didn't get all the milk out - put your pump on for just 1-2 minutes to make sure everything is cleared out.
3 - Dangle nurse. This is a weird trick and is new to me this time. The suggestion I read recommended laying your baby on the floor and kneeling over the top so as to use gravity to force the clog out. I found it was just as effective to sit cross legged with the baby on my lap and to lean over. This REALLY helped though. A couple of sessions of dangle nursing are sometimes all it takes to get the clog out.
4 - Apply heat. Take a warm shower and try to massage where it is sore (I know, it hurts). Or heat up a bean bag about 5 minutes before you feed the baby and apply it to the sore side. Then massage for about 30 seconds before you start feeding. This is a life saver.
5 - Garlic. I've read that you should eat a lot of it, though that's not the trick I've tried. My SIL gave me the advice of putting a raw garlic clove in my bra. This works great for me. I find a HUGE garlic clove, peel it and set it right next to the clog. For some reason this works - I swear.
6 - To prevent future clogs take Lecithin. This is a LARGE capsule that you can find in pretty much any store that sells medicine. The bottles aren't too expensive and they come with 100 capsules. Kelly mom recommends taking 3-4 capsules per day until you go a few weeks without clogs, then you can reduce it by one capsule, eventually working down to one. There are no ill effects for babies or nursing mothers.
If I use these tricks I can generally get a plugged milk duct cleared up in under 24 hours, though I've had some nasty ones that lasted for DAYS (maybe even a week).
For other suggestions see the Kelly Mom website.
Now for your input...
What do you do for plugged milk ducts?
What do you do for mastitis?
Share your horror/success stories!
And one more thing... how do I get rid of all the milk I'm making in the night????
Tuesday, August 30, 2011
Tutorial: How to Make Baby Food!
Since we got such a positive response to this post last time it was up, and a couple of us on the panel are going to be entering the phase of baby food soon, we thought we would repost this great post on making your own baby food!
One of our readers sent us a complete tutorial on how to make your own baby food. This is something that I've wanted to do for a long time, but was never brave enough to figure it out on my own. Thank you so much! If you have any ideas for tutorials feel free to e-mail us at thevillageformoms@gmail.com
CHECK IT OUT!
I have loved making my own baby food for my two children. When I first thought about making my own food, I thought it would be so complicated and take so much time, but I am here to tell you how simple it really is!
First, here are the reasons I like making my own baby food:
1. The cost! I did my own cost comparison to see how much money I was really saving by making my own. Gerber baby food comes in two packs costing between $0.75 and $1.00, and each container is 2.5oz. This equals $0.15 to $0.20 per ounce. I bought 2 lbs of carrots for $1.55 which made 31 oz pureed. This equals $0.05 per ounce! The peas were also $0.05 per ounce. Green beans were $0.07 per ounce and butternut squash was $0.14 per ounce. Fruit tends to be more expensive but you may be able to find some good deals depending on the season. You can also buy the fruit on sale, puree it, and freeze it for use when your baby is ready to start solids.
2. It gives me peace of mind to know exactly what is in the food my baby eats. There are no fillers or preservatives. I know how fresh the produce is and when it was made. It smells good, and I have no problem tasting it which makes me feel better about feeding it to my baby.
3. It's really simple! I can make all the food my little girl will need pureed in one day. After she eats all the food I have pureed, she will probably be ready to start more table foods.
The Process
I put together a little tutorial so you can see step by step what to do. Hopefully if you are feeling overwhelmed by the thought of making your own food, this will help ease your mind a little! Please pardon my pictures.. I am not a pro photographer :)
I first made pears. Six pears ended up making 23 oz.

1. Cut your pears in half and scoop out the core. ( I thought I could scoop out the core after I cooked them, but I later regretted it.)
2. Place them cut side down in a baking dish. Pour water into the dish to cover about 1/2 inch of the fruit.
3. Bake the pears at 350 degrees for 25 minutes or until tender. (Your house will smell delicious!) Don't throw away any left over water just yet!

4. When they are baked the skins will be brown and wrinkly. After they cool, peel the skins off. They should come off pretty easily by pinching the skin. ( I cooked mine a little too long so the skin was very soft and harder to get off.)
5. Place your pears into a pureeing device. I use a magic bullet, but a food processor, blender, immersion blender or even a hand food mill (click to see food mill) will work. If your puree is too thick, add some of the water that you saved from baking them. Adding stock water back is good because you get some of the nutrients back that were baked out. You can also add water or thicken it with rice cereal when you want to feed it to your baby.
6. I use a freezer method, so I pour the puree into ice cube trays. Cover with plastic wrap and freeze. Once they are frozen, you can pop them out and into a freezer bag. I find that one cube (approx. one ounce) is the perfect size to start out with. When my kids get a little older I just warm up two cubes instead of one. I had four trays laying around, but if you don't have any, I have seen packs of two at the dollar store.


Make sure to label the bag with the date and type of food.
When I want to warm up the food, I just place it in the microwave for about 30 seconds, stir it, and place it in for 7 more seconds. Make sure to stir it and check that it's not too hot because microwaves can cause hot spots.
And that's it! I made 6 different purees, and it only took me half a day, not including freezing time.
FAQ's:
Should I use canned, frozen, or fresh produce?
Canned food should never be used. The biggest reason is loss of nutrients. For more information click HERE. Frozen and fresh foods are a both good option. If you use frozen, be sure to read the labels to make sure there is no added salt, sugar, or syrups.
What are different options to cook the food?
1. Baking with water, like the example of the pears. I also bake butternut squash and peaches this way.
2.Baking without water, like baking a sweet potato.
3. Steaming or boiling - this works well with many vegetables like peas, carrots, green beans.
What if I don't have enough trays?
I put the extra purees into containers in the fridge. When the first cubes froze, I popped them out and froze the purees that I had saved in the fridge. This way I could do all the cooking in one day, even though it took longer to actually freeze them.
Is it necessary to strain vegetables?
I strain the vegetables that have outer skins that are harder to digest (like peas and green beans.) After I puree them, I put them into a strainer over a deep bowl and push it through with a spoon. Scrape off the back of the strainer, and all that will be left in the strainer are tiny bits of outer skin. Some people think this may not make a difference for baby, but I found that my son had a hard time digesting peas until he was over a year old.
What about meats?
A note about meats-- I thought that there was no way pureeing meats would work, but it really did! I just boiled the chicken and pureed it, adding a little liquid. See HERE for information on choosing types of meats that are good for baby. Meats were my least favorite thing about jarred food, so I was so glad that pureeing meats worked so well (and actually smelled good!) Try it!
My favorite resource on making baby food is this: wholesomebabyfood.com. It really can answer almost any question and has great ideas for making your own rice cereal, teething biscuits, and toddler food too.
Thank you very much once again. What a perfect tutorial! So......
What questions do you still have?
Have you made homemade baby food? Do you like it? Give us your success stories!
What are other pros/cons of doing homemade food?
What other advice can you offer about homemade food?
One of our readers sent us a complete tutorial on how to make your own baby food. This is something that I've wanted to do for a long time, but was never brave enough to figure it out on my own. Thank you so much! If you have any ideas for tutorials feel free to e-mail us at thevillageformoms@gmail.com
CHECK IT OUT!
I have loved making my own baby food for my two children. When I first thought about making my own food, I thought it would be so complicated and take so much time, but I am here to tell you how simple it really is!
First, here are the reasons I like making my own baby food:
1. The cost! I did my own cost comparison to see how much money I was really saving by making my own. Gerber baby food comes in two packs costing between $0.75 and $1.00, and each container is 2.5oz. This equals $0.15 to $0.20 per ounce. I bought 2 lbs of carrots for $1.55 which made 31 oz pureed. This equals $0.05 per ounce! The peas were also $0.05 per ounce. Green beans were $0.07 per ounce and butternut squash was $0.14 per ounce. Fruit tends to be more expensive but you may be able to find some good deals depending on the season. You can also buy the fruit on sale, puree it, and freeze it for use when your baby is ready to start solids.
2. It gives me peace of mind to know exactly what is in the food my baby eats. There are no fillers or preservatives. I know how fresh the produce is and when it was made. It smells good, and I have no problem tasting it which makes me feel better about feeding it to my baby.
3. It's really simple! I can make all the food my little girl will need pureed in one day. After she eats all the food I have pureed, she will probably be ready to start more table foods.
The Process
I put together a little tutorial so you can see step by step what to do. Hopefully if you are feeling overwhelmed by the thought of making your own food, this will help ease your mind a little! Please pardon my pictures.. I am not a pro photographer :)
I first made pears. Six pears ended up making 23 oz.

1. Cut your pears in half and scoop out the core. ( I thought I could scoop out the core after I cooked them, but I later regretted it.)
2. Place them cut side down in a baking dish. Pour water into the dish to cover about 1/2 inch of the fruit.

3. Bake the pears at 350 degrees for 25 minutes or until tender. (Your house will smell delicious!) Don't throw away any left over water just yet!

4. When they are baked the skins will be brown and wrinkly. After they cool, peel the skins off. They should come off pretty easily by pinching the skin. ( I cooked mine a little too long so the skin was very soft and harder to get off.)

5. Place your pears into a pureeing device. I use a magic bullet, but a food processor, blender, immersion blender or even a hand food mill (click to see food mill) will work. If your puree is too thick, add some of the water that you saved from baking them. Adding stock water back is good because you get some of the nutrients back that were baked out. You can also add water or thicken it with rice cereal when you want to feed it to your baby.

6. I use a freezer method, so I pour the puree into ice cube trays. Cover with plastic wrap and freeze. Once they are frozen, you can pop them out and into a freezer bag. I find that one cube (approx. one ounce) is the perfect size to start out with. When my kids get a little older I just warm up two cubes instead of one. I had four trays laying around, but if you don't have any, I have seen packs of two at the dollar store.


Make sure to label the bag with the date and type of food.
When I want to warm up the food, I just place it in the microwave for about 30 seconds, stir it, and place it in for 7 more seconds. Make sure to stir it and check that it's not too hot because microwaves can cause hot spots.
And that's it! I made 6 different purees, and it only took me half a day, not including freezing time.

FAQ's:
Should I use canned, frozen, or fresh produce?
Canned food should never be used. The biggest reason is loss of nutrients. For more information click HERE. Frozen and fresh foods are a both good option. If you use frozen, be sure to read the labels to make sure there is no added salt, sugar, or syrups.
What are different options to cook the food?
1. Baking with water, like the example of the pears. I also bake butternut squash and peaches this way.
2.Baking without water, like baking a sweet potato.
3. Steaming or boiling - this works well with many vegetables like peas, carrots, green beans.
What if I don't have enough trays?
I put the extra purees into containers in the fridge. When the first cubes froze, I popped them out and froze the purees that I had saved in the fridge. This way I could do all the cooking in one day, even though it took longer to actually freeze them.
Is it necessary to strain vegetables?
I strain the vegetables that have outer skins that are harder to digest (like peas and green beans.) After I puree them, I put them into a strainer over a deep bowl and push it through with a spoon. Scrape off the back of the strainer, and all that will be left in the strainer are tiny bits of outer skin. Some people think this may not make a difference for baby, but I found that my son had a hard time digesting peas until he was over a year old.

What about meats?
A note about meats-- I thought that there was no way pureeing meats would work, but it really did! I just boiled the chicken and pureed it, adding a little liquid. See HERE for information on choosing types of meats that are good for baby. Meats were my least favorite thing about jarred food, so I was so glad that pureeing meats worked so well (and actually smelled good!) Try it!
My favorite resource on making baby food is this: wholesomebabyfood.com. It really can answer almost any question and has great ideas for making your own rice cereal, teething biscuits, and toddler food too.
Thank you very much once again. What a perfect tutorial! So......
What questions do you still have?
Have you made homemade baby food? Do you like it? Give us your success stories!
What are other pros/cons of doing homemade food?
What other advice can you offer about homemade food?
Friday, August 26, 2011
In My Cabinet...

UGH. It's been one of THOSE mornings, ladies. I feel like shoving my head under a pillow and screaming at the injustice of it all. Today, my toddler opened the day by dumping a full glass of chocolate milk on his lap. Not an accident. He watched the liquid pour, and he was smiling. I reprimanded him, and made him clean it up. Not twenty minutes later, he poured a glass of apple juice onto his legs and all over the floor. Icky. Sticky. Apple juice. I made my toddler clean up the mess and stripped him down to his diaper for 10 minutes. "You can't wear clothes if you're just going to get them wet," I said. That was punishment enough. My boy detests going without clothing. He huddled up on the floor and cried big crocodile tears. Meanwhile, I nursed my baby one-handed while crouching down and helping my boy mop up the juice. Inside, I thought, "How did it come to this?"
Now my floor is gross-sticky. No matter how many times I go over it with a wash rag, my feet still stick to the floor. So, now let's head into our main topic of discussion. Kitchen cleaning products. Oh yes. We're goin' for all sorts of excitement today. Half kidding. Half completely serious. I'm all for it on days like today when I'm in a cleaning pinch. So, here we go. Here's my Cleaning Cabinet Top 5...
1. Disinfectant wipes. Usually the Clorox variety. They're so darn useful. As an added plus, they're great for introductory toddler chores. One of my boy's favorite chores is to take a disinfectant wipe and wipe down all the doorknobs. It's something easy, I usually don't get around to doing it, and who cares if he misses a spot? Perfect for toddlers.
2. Bleach. Whenever I'm working with raw food -- veggies, fruits, but especially meat -- I fill the sink with diluted bleach and bomb my kitchen afterwards with it. Let it sit for 10 minutes, then wipe down with hot water. Heat will accelerate the breakdown of hypochlorite in bleach and make bleached surfaces safe to touch as soon as it dries.
Oh, added tip. Remember the last time your kid threw up in the car? No? I try not to remember stuff like that either. But when it happens, strip the cover off (throw in washing machine) and soak the plastic part in the bath tub in a diluted bleach for 10 minutes. Make sure you scrub the shoulder straps. Rinse with hot water. Your baby's car seat will magically smell like nothing ever happened. I speak from experience. I may have sung hallelujah to bleach that day.
3. Distilled white vinegar. Oh, this baby has so many uses. It's cheap. It's powerful. It's chemical free. To deodorize a yucky drain, pour one cup of hot vinegar down the drain, wait five minutes, and rinse. To clean out a chalky dishwasher, throw in a cup of vinegar and run a cycle empty. To clean cloudy glassware, soak a cloth in vinegar and wrap around the dish. To remove odors from a lunchbox or plastic food containers, wipe down with vinegar and leave a rag or piece of bread soaked in vinegar in it overnight. For more ideas, click HERE. Oh, and about that apple juice mess I mentioned above. It can be easily cleaned with a homemade vinegar-based cleaner.
BASIC FLOOR CLEANER: Combine 1 cup white vinegar with 1 gallon warm water. Use on vinyl surfaces.
WOOD FLOOR CLEANER: Combine 1/2 cup white vinegar with 1 gallon warm water. (When cleaning wood floors, make sure you don't saturate the floor, since wood soaks in a lot of moisture. Dampen sponge, wring out into a bucket, then scrub.)
4. Ammonia. I know. I freaked a little about buying and having ammonia in my home at first. "It's not safe!" yelled my brain. Calm down, brain. If you look at the ingredients list of most household cleaners, more often than not, ammonia's already in there. The reason is that very few surfaces can be cleaned and disinfected well without it. Wood. Steel. Kitchen countertops. Refrigerator doors. All clean well with ammonia. Just make sure to mix your cleaners in a well ventilated room and keep it safely stored away from baby hands like you would any store-bought cleaner.
For you curious folk, you probably wondered, what's the difference between bleach and ammonia. They both clean and disinfect, right? Well, yes, but there are subtle differences. Sparing you the details, we'll just say that because of their chemical make-up BLEACH IS A STRONGER DISINFECTANT. Ammonia still kills germs, but not with the gusto of bleach. The benefit of that is that ammonia will clean surfaces without discoloring them. Bleach will sometimes cause discoloration or lightening.
For you curious folk, you probably wondered, what's the difference between bleach and ammonia. They both clean and disinfect, right? Well, yes, but there are subtle differences. Sparing you the details, we'll just say that because of their chemical make-up BLEACH IS A STRONGER DISINFECTANT. Ammonia still kills germs, but not with the gusto of bleach. The benefit of that is that ammonia will clean surfaces without discoloring them. Bleach will sometimes cause discoloration or lightening.
ALL-PURPOSE CLEANER:
2 T ammonia
1 tsp dish detergent
2 cups rubbing alcohol
In a clean, gallon container, combine above ingredients and fill the rest up with hot water. Put in spray bottles to use.
STREAK-FREE WINDOW CLEANER
3 T ammonia
1 T vinegar
Combine above ingredients in a spray bottle and fill the rest up with water. (I can't believe I used to pay so much for Windex.)
5. Baking soda. Baking soda has scrubbing power but won't scratch surfaces (use in place of Comet). You know those hard-to-clean grease spots above the stove? Baking soda will take care of it, no problem.
SCRUBBING CLEANSER:
1/4 cup baking soda
1 T liquid detergent.
Combine above ingredients. Add white vinegar until creamy texture and use to scrub kitchen stains or clean the oven.
Finally, because this post somehow morphed into a homemade cleaner article, take a gander HERE for a recipe to make your own baby wipes. I would just add a few drops of baby lotion for moisturizing properties and a splash of rubbing alcohol (about a teaspoon) to keep mold from growing and give your wipes a bit of disinfecting power. Other than that, I could show you how myself, but this gal already did a great job and...well...I've still got sticky apple juice that needs to be scrubbed off the kitchen floor...
In the meantime, the discussion's open. Homemade or not? How do you get your cleaners? Why? If you've never tried making homemade cleaners, did this post compel you to give it a try? Let's hear it! And in the meantime, happy cleaning. I keep telling myself that to kid myself into liking it.
-Alyssa
SPECIAL NOTE: Never, EVER mix bleach with any acid, like ammonia or vinegar. In fact, play it safe and never mix bleach with anything besides water. Chemical reactions that result from mixing could be very dangerous.
REFERENCED: www.thefamilyhomestead.com/homemadehouseholdcleaners.htm
Thursday, August 25, 2011
Can't Fall Asleep

Here's the scenario:
8 o'clock comes so we start our bedtime routine. We change into jammies and a pullup, brush our teeth, say prayers and read a story. Usually all of this takes about a half hour and my husband and I are out of Lucas' bedroom by 8:30. We head to the living room to hang out and spend some time together before we go to bed. However, 9 o'clock rolls around and Lucas is still awake talking to himself, no big deal. 9:30 comes and Lucas is still awake, 10:00 and he is still awake; sometimes this can go on until 11 o'clock at night or later!
This doesn't happen every night, but it happens a couple of times a week. So, I tried to cut out his afternoon nap thinking that would help, it didn't. We were still have two to three nights a week where he was awake very late and then he was just grumpy to boot for not getting his nap. During the summer I wasn't too concerned with one or two nights of this happening, but now it is school time. I don't want him staying up really late because there are at least two days a week where he won't be able to take an afternoon nap due to preschool. However, I'm at a lost as to what to do. I've tried several more things besides doing away with the nap and nothing has worked.
What do you do for your kids when they can't seem to fall asleep?
-Megan-
Wednesday, August 24, 2011
Choosing a Preschool

My little girl is FINALLY old enough for preschool. She is now "pre-kindergarten" age. Technically I could have put her in last year, but I didn't really see the need. She's been dying to go to school for ages though, so she is positively excited.
Choosing a school was much harder than I had anticipated. This is my first time sending a child to school, so it was new for me.
I picked up some tips through this last week of dilemma. I hope they help you and that you have some to offer if you've already sent one of your children to preschool.
1 - If you can avoid it, don't wait until the last minute. I didn't have much of a choice.... we just moved to our new house a week ago (and it's in an entirely new state), and school starts in just 2 weeks. I had to work FAST. As a result I felt pressured to choose. There aren't many spots left open in preschools at this time of year. Explore your options early so you can feel confident about your choice.
2 - Ask for suggestions. This one goes without saying... but it's important. I searched out 3 preschools and all of them came off of referrals from ladies in my ward. I had to be bold and ask FAST since I had just met them, but it was worth it.
3 - Go meet the teacher/see the preschool in person! Don't just make a judgement call based on what others have said or over a phone conversation. You might have different tastes/needs for your child than your friend. I had preconceived notations about the schools I was looking into and ended up choosing the one I didn't think I would after I had met the teacher and seen the school. I really liked one teacher over the phone AND in person. The other teacher I didn't really like when I talked to her over the phone, but upon meeting her in person I discovered that she's awesome, and just doesn't do well on the phone.
4 - Take your child with you to see the schools and meet the teachers. Let him/her be part of the process and if possible let your child give input. In the end I had narrowed it down to 2 schools that I really liked and I couldn't choose. There were pros and cons for both. It was a HARD choice. I asked my daughter SEVERAL times which one she liked better and every time she said the same one. Since she liked it so much I picked her preference.
5 - If price is a concern you can POSSIBLY get someone to lower their prices. At one point I had settled on one school and called the other teacher to let her know I had chosen somewhere else. When she asked if it was because of the price difference and I said yes, she offered to match the price of the other school! WOW! (I think it helped that school starts in 2 weeks and she wants to fill up.)
6 - Choose a school that fits the needs of your child. If I was concerned about my daughter academically I would have chosen preschool with very few children in it (there was one I looked at that would have had only had 8 kids in the class with my daughter). However, I was looking for a great social experience, so I ended up choosing the school with 16 students and 2 teachers so she would get more of a feel for what kindergarten will be like. This school is an actual building instead of a basement which really appealed to my daughter. I also picked the school that only had pre-kindergarten age children in the class, instead of one with 3 year olds in it as well.
7 - Pray about it. After we'd made the choice I told my daughter that we should pray about it to make sure our choice was good. What a wonderful opportunity to teach your little one about making big decisions WITH Heavenly Father.
8 - If it works for you and you don't have the money, do preschool at home or do a JOY school with other mothers in your area. I can promise you that your child will be academically sound for kindergarten if he/she knows the basics (shapes, numbers, colors, letters, sounds). If you are worried about it, contact a kindergarten teacher in your area and find out what your child needs to know before kindergarten.
I hope this helps!! What other tips do you have for choosing a preschool for your child?
~Tannie
Don't forget to check out Megan's post below about tips for starting school. Although I taught elementary for 3 years, I've never been on the other end of the spectrum. I too would love some advice on getting kids ready for school.
Monday, August 22, 2011
DryErase ABC Book
I am always looking for new ways to introduce my kids to the alphabet, numbers and other topics. Awhile ago I read about using a photo album to create a picture book. I thought it sounded like a nice way to create a toy/activity for my kids that could be personalized to them or to a concept I wanted to teach.
I decided to make more than just a picture book. I figured why not make a reusable coloring ABC book. So that is what I did.


I told you this would be an easy project. My son LOVES this book. We talk about the letters and their sounds as he colors. I am also hoping that he will learn some new vocabulary words - like octopus and quail.
I like that it is small enough to fit into the diaper bag. I plan on using when we are out on errands that require a lot of waiting (doctor visits, anything to a government office).
I decided to make more than just a picture book. I figured why not make a reusable coloring ABC book. So that is what I did.
Materials Needed:
photo album (I got mine at the dollar store)
scissors
* I made these printables myself. Feel free to use them or just use them as a sample and make your own. I promise I won't be offended.
This is so simple to make. If you use the printables it will only take about 20 minutes - enough time to cut out the pictures and put them in the book.
Step 1:
Cut out the pictures.

Step 2:
Insert pictures into the photo album

Optional:
Insert cover

Step 3:
Hand book and crayons (dryerase markers can also be used) to your child and let them color away.


I told you this would be an easy project. My son LOVES this book. We talk about the letters and their sounds as he colors. I am also hoping that he will learn some new vocabulary words - like octopus and quail.
I like that it is small enough to fit into the diaper bag. I plan on using when we are out on errands that require a lot of waiting (doctor visits, anything to a government office).
I hope you like this idea. It is a really inexpensive way to introduce the ABCs and have fun with your kids.
Let us know if you have any fun teaching ideas or projects for kids.
I am always on the hunt for new ideas!
~Lisa~
Friday, August 19, 2011
Bring On The Play Dates

It's never too early to arrange play dates. I love them. Play dates are fun for me, my child gains valuable social skills, and spending time with other human beings make those long hours before my husband gets home fly like nothing else. There's only so many conversations I can have with my toddler before I start itching to hear complete sentences. But remember, play dates are more than scheduling a time, date, and a place on your little sweetum's social calendar...there's etiquette, inevitable problems, and all sorts of things to consider.
THINGS TO CONSIDER:
Age: In the beginning, play dates may be more for the society-deprieved young mother than a small baby, but it's never too early to start. Babies are fascinated by other babies. I remember my child progressed through milestones leaps and bounds faster after watching other kids roll, crawl, and walk around him. If your toddler is one of those that prefer playing alone, never fear. They'll still value the time spent in another kid's company. Co-playing will come easier as they get older, usually between ages 3-5.
Gender: Doesn't really matter with young toddlers. If anything, play dates are an excellent opportunity to spend time with a child of the other gender. My two year old son's temperament is super mellow, so he actually plays better with girls than he does with most rough-housing boys. When gender DOES start to matter, your child will let you know.
Frequency: I have a three month old baby as well as a toddler, so once a week is about all I care to pack up the kids for. Other mothers with more mobile kids seem to reach a general consensus that twice a week is a good number for planning social times as well as keeping the general routine of the house in-tact. On the other hand, especially busy mothers are hard-pressed to make a play date work once every couple weeks. The important thing is to cater it to your schedule. Whatever works for you and your family and doesn't stress you out.
Location: Because my toddler is two and a half and prone to meltdowns in confined spaces, location is a big issue for me. My friend and I discovered just last week that the library is NOT a good place to take toddler friends. They just wanted to run around, yell, jump on kiddy-size furniture, and be toddlers in general. Since then, we've stuck to parks, playcenters, and each other's houses. Full-on excursions will have to wait for when the kids are older.
Length: Two hours is about the point of no return for my kiddos. Anything too far beyond that makes for overtired, overstressed, overplayed children that are a BEAST to put down for a nap later on. And I mean that with all the motherly love I've got in me. I've found that play dates work best when we semi-structure out different activities. Play time. Snack. Activity. Play time. Pack up. Leave. Switching up what the kids are doing will help keep them from getting bored and frustrated with each other.
Reciprocate: If one mom hosts a play date at her house, make sure you do the same for her. It's just the right thing to do.
COMMON PROBLEMS:
Now, all that said, play dates don't come without problems. One common one is SHARING...(oh the never ending battle) toys, food, mommies, babies, you name it...if a playmate has it, the other kid wants it. Sometimes it helps to narrate the situation. Get your child used to the idea of someone coming over to play by giving him a heads up before Johnny comes over. Once Johnny gets there, physically take and hand the toys between the toddlers (at good transition points) and explain that both of them get to play with it when it's their turn.
Another problem is SHY children. You go through all the trouble of arranging a play date, but your little angel sticks to you like glue. Sigh. Is the play date even worth it? Yes! Keep at it. Ask your mother-friends for help and explain the situation. As much as possible, you want your toddler to practice getting used to other people with the comforting feeling that mommy's close by. Try to be there without getting in the middle of it. Let your child explore their own creativity. The last thing you want to do is avoid play dates altogether. Let's just say...avoiding social time is going to make preschool REALLY shocking for your child.
So, I turn the time over to you ladies. How often do you schedule play dates? What do you usually do (for what ages)? And how do you deal with the problems listed above? My boy is one that's a little shy around other kids...especially if there's A LOT of other kids, like at a play center. Please share your fabulous advice! I appreciate your feedback. Thanks, gals!
-Alyssa
Thursday, August 18, 2011
It's that Time Again

-Megan-
Monday, August 15, 2011
Somedays I Just Need a Reminder
"The noblest calling in the world is motherhood.
True motherhood is the most beautiful of all arts, the greatest of all professions.
She who can paint a masterpiece, or who can write a book that will influence millions, deserves the admiration and plaudits of mankind;
but she who rears successfully a family of healthy, beautiful sons and daughters, whose immortal souls will exert an influence throughout the ages long after paintings shall have faded, and books and statues shall have decayed or have been destroyed, deserves the highest honor that man can give, and the choicest blessings of God."
~David O. McKay
"Chapter 16: The Noble Calling of Parents," Teachings of Presidents of the Church: DavidO. McKay, (2003)
Saturday, August 13, 2011
Book Sale Announcement in Logan, UT
A great follow-up to our fabulous discussion POST about children's books...

These sales come around a couple times a year. Back when I lived in Logan, I would go to every single one and stock up on great, new and classic children's books at an insanely affordable price. She always has a fantastic selection. There's always a table full of board books, cases of classic books for toddlers and young children, easy readers for young beginners, and entire book shelves of young adult novels (I've picked up a lot of my Harry Potters there). All her books are new and in perfect condition and always at low, low prices. If you live close, I'd definitely drop by. Go! You won't regret it.
NEXT SALE:
August 16-20th
1612 East 1220 North
9:00 am - 12:00 noon
For more information, visit her website at www.thebookladysdaughter.com.
-Alyssa
Friday, August 12, 2011
To Share a Room, Or Not Share a Room...

That's the big question at my house this month. Reasons for room sharing are vast, but most center largely on two factors, (a) necessity, there just aren't enough rooms in the house and (b) the parents want siblings co-exist in the same room to build better relationships. Which is better? Well, it depends. Here are some pros and cons to consider.
THE UP SIDE
The most obvious benefit is that kids learn to live with someone else. They learn to negotiate decorating a room together and cleaning when one child is messier than the other (ehem, good practice for marriage, perhaps). Good behavior can also rub off on the other child, like seeing a sibling reading, or drawing, or investigating sciency-stuff in their room. And finally, parents of room-sharing kids often say that the biggest plus is that at night time, when dark shadows and overactive imaginations bring out worry in some kids and they don't like to be alone, having another sibling close by quells some of the night time fear.
THE DOWNSIDE
On the other hand, I shared a room with my sister growing up, and I can attest that with regards to room maintenance, bad behavior rubbed off more than good. You would think that one of us would be cleaner than the other, but we seemed to augment each other's hurricane of clothes, books, toys, and trinkets on the floor until seeing the carpet was nigh near impossible. My dad would have to threaten to throw all our stuff in the dumpster to jump start our bi-monthly room cleaning extravaganza.
Other parents complain of children waking and keeping each other up during the night. Some kids spur competition, ("I want a drink." "Me too!" "I need to go potty." "ME TOO!") making bed time practically impossible. This not-so-good bed time behavior is clearly not constructive or helpful in relieving bed time headaches.
As kids get older, the biggest drawback may be privacy. If y'all remember growing up, having an ALONE space to go to was sometimes very necessary.
SO, WHAT TO DO
None of the downsides have to keep your kids from sharing a room. If space is limited...well, there's not much logical reasoning that can do anything about that. Room sharing will have to happen, but bringing all the variables into the decision may change subtle nuiances of how you go about doing it.. Experts do advise though with older children, if room-sharing and single rooms are both an option, to bring the kids in on the decision making process. Kids know best whether or not their sibling friendship can stand the test of sharing a room. You might want to try a weekend sleepover to see if it works!
MY REAL-LIFE SITUATION
My kids are NOT in the rational, "older" kids category to have a discussion with. My boy is two. My baby's 3 months. We don't have room for them NOT to share a room, and I want my baby out of my room. Neither of us is getting good sleep with things as they are. My kids will have to share a room.
I'm just not sure how to get things rolling.
So, what are your thoughts? What do you remember (pros and cons) of sharing a room with your sibling? For those of you with kids, what kept you from putting them in the same room? At the same time, for parents who have kids sharing a room, how did you do it? I need help. I don't see how it'll work. My toddler will SO wake my baby up any chance he gets. Not good. I really appreciate your comments. Thanks much!
-Alyssa
Thursday, August 11, 2011
Scaredy Cat!!

Friday night we went up to my in-laws for dinner. This spring they decided to try raising chickens and the chickens are left out to roam the yard. Well, one of their roosters attacked Lucas. He had a couple of scrapes on his shoulder but was other wise all right. However, because family from out of town is visiting we were back up there again on Sunday and Lucas is now afraid of the chickens. Whenever one gets close to him, he runs in the other direction or to the closest adult. I understand his fear, I was attacked by a rooster when I was around his age and didn't like chickens for a long time either, but I don't want him to be afraid of them because then he doesn't want to be out in grandma and grandpa's yard. We can't put the chickens in a pen because they are free ranging chickens and are only locked up at night. So, any suggestions on helping a child scared of an animal?
- Megan -
Tuesday, August 9, 2011
Picture Schedules
Anyone who has ever worked in preschool settings or with kids with disabilities have seen or used picture schedules. My personal background comes from the angle of working with kids with autism - severe and high functioning/aspergers. I have used picture schedules for a multitude of tasks. Let me say..


I Love Them!
Picture Schedules use picture cards to show the sequence of events for a given time period or detail the steps of a specific task (ie morning/bedtime routine, brushing teeth, chores).
While typically used for kids with disabilities, I think they have great benefits for kids of any age and ability. I especially like them for introducing new routines or skills.
Benefits of a Schedule:
- Kids can visually see what is coming up next. There is no guessing for the parent or the kid.
- Kids see how many steps are left until they are done.
- If a reward or treat is associated with the task, the kids know what they have to do in order to earn the reward.
- This one was really useful for me when I taught my son to brush his teeth. He earned a sticker when he was done. Once he saw what he had to do before he got the sticker, he was much more cooperative with the process.
Here is how I make a picture schedule...
Step 1: Figure out the sequence of event in your schedule.
The schedule I made last was for our bedtime routine.
The steps:
brush teeth
pajamas
read 3 books
read scriptures
prayer
in bed with lights out
Step 2: Find a picture to represent each step.
I just google images. You can also take pictures of your own kids doing each step. Some kids really like seeing pictures of themselves on the schedule.

Step 3: Make your board or folder where you will display your schedule.
I used a white posterboard. You can also use a manila folder, cardstock or anything surface really that will fit your needs. (The manila folder works well for traveling).

The line down the middle separates the "To Do" from "Done." When a step has been completed, either you or the child moves the picture from the left side to the right side to show that that step is done and it is time to move on to the next step.
Step 4: Laminate pieces
I use contact paper. For other laminating options, read Alyssa's great post from a couple of weeks ago.

Step 5: Velcro!
Craft stores have velcro dots you can use for easy application. I just cut pieces off of the long strips of velcro. Just make sure you buy the velcro with the sticky back.

Step 6: Set up the schedule
Step 7: Teach your child how to use the schedule
This is by far the most important step. For all your hard work to pay off, you need to teach your child what each picture means and teach them how to use the schedule.
We taught our bedtime routine as part of Family Home Evening last night. I let the kids play with pictures for a few minutes while we talked about what each picture meant. Then we walked through the schedule together.

Learning how to move the pictures when done with a step.
These kinds of schedules can be used to almost anything. Just have fun with them. You can use as many or as few steps as you need to help your child understand what is going on. You can also change the length of the activity depending on how much time you have. (For example, if we have a late night we might only read scriptures. I would show the change by just leaving the books off.)
Do you have any ideas for teaching new skills or routines? Or, do you have a skill you want to teach and have questions on how to do it? Leave a comment and we will see if we can help.
~Lisa~
Friday, August 5, 2011
Best Books to Read to Toddlers
Reading to your children is one of those foundation activities that every parent should do. I'm usually a bit cautious making grand statements like this, but in this case, every expert on the planet will agree it's absolutely true. Why?

"Cook-A-Doodle-Doo!" is a to-die-for adorable book about the Little Red Hen's great-grandson who decides he's sick of eating chicken feed and wants to try out cooking like his great granny. The story is clever. The writing introduces simple cooking terminology in a GENIUS and incredibly fun way. The dialogue between the characters made my husband burst out laughing. And the art is absolutely gorgeous. (If you know me, I'm a sucker for great illustrations.) I didn't have this one growing up, but I completely adore it now.

This is one I grew up with. "The Little Mouse, The Red Ripe Strawberry, and The Big Hungry Bear," (besides having the longest title ever) is one of the funnest books to read to toddlers. The story is about a little mouse who, after picking a strawberry, goes about different methods of hiding it from the bear. The writing is, again, genius. My boy can hardly stand the suspense of what's going to happen to the poor strawberry (even after the hundreth reading). And once again, the illustrations are gorgeous.

A classic, am I right? "Each Peach Pear Plum" makes a fantastic I-spy game out of beloved nursery characters all while subtly introducing words the rhyme.


Oh, another classic. My boy ADORES this book. It's an absolutely fantastic way to drill colors without your kid knowing what you're up to. :) Meanwhile, all the familiar animals make my child excited to keep turning pages.


Short and sweet. This is the first book I ever bought for my child. In just a handful of pages, "The Little Engine That Could" by Piper Watty tells a wonderful story about how anything is possible if you believe in yourself. What a great lesson to teach your children.
And these are just the tip of the iceberg. There are SO many good books out there. What are your favorites? Why are they so good (aka what lessons do they brilliantly teach)? I'd love to hear some excellent tips for new books to try out. I bet with all of us, we can come up with a pretty fantastic list. :)
- A parent reading to her child introduces vital language skills. If mommy reads, then children are drawn to the idea that letters and words work together to make something important to pay attention to. We've all been through years of school and life, and we all know, being able to read can make or break you in this world. Our job as parents is to prepare our kids for adult life, and let's be honest; reading skills are a vital part of that.
- Reading can open new worlds. Cheesy? Maybe, but it's absolutely true. Reading is a sure-fire way to introduce new ideas, encourage learning more advanced vocabulary, and foster a curiousity for learning that just doesn't come up in a normal, home atmosphere without books.
- Reading time is precious social time with mommy and daddy. We're busy. We all know that. I feel like I'm going a hundred miles an hour all day, but taking time to slow down, relax, and read to your children will make special memories that'll mean the world to them. Your small sacrifice of 15 to 30 minutes a day will be paid back a hundred-fold. I promise. I still remember hearing my father's voice as he read to me all those years ago.
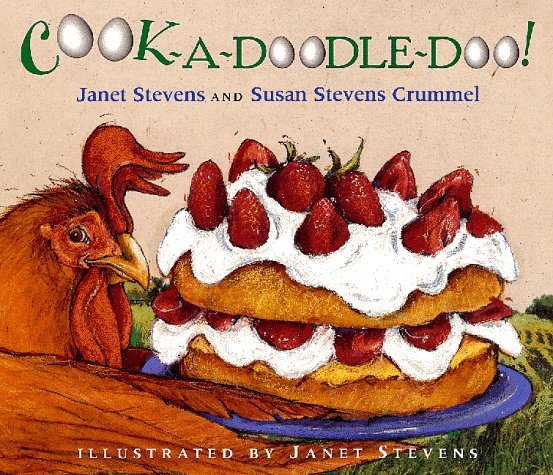
"Cook-A-Doodle-Doo!" is a to-die-for adorable book about the Little Red Hen's great-grandson who decides he's sick of eating chicken feed and wants to try out cooking like his great granny. The story is clever. The writing introduces simple cooking terminology in a GENIUS and incredibly fun way. The dialogue between the characters made my husband burst out laughing. And the art is absolutely gorgeous. (If you know me, I'm a sucker for great illustrations.) I didn't have this one growing up, but I completely adore it now.

This is one I grew up with. "The Little Mouse, The Red Ripe Strawberry, and The Big Hungry Bear," (besides having the longest title ever) is one of the funnest books to read to toddlers. The story is about a little mouse who, after picking a strawberry, goes about different methods of hiding it from the bear. The writing is, again, genius. My boy can hardly stand the suspense of what's going to happen to the poor strawberry (even after the hundreth reading). And once again, the illustrations are gorgeous.

A classic, am I right? "Each Peach Pear Plum" makes a fantastic I-spy game out of beloved nursery characters all while subtly introducing words the rhyme.

"There's a Wocket in my Pocket" is one of Dr. Seuss's many gems. I love this one, because it's simply written (some of Seuss's books can get a little wordy for a toddler) and is a great introduction to rhyming. My boy likes it because all the wacky Suess-animals are in familiar settings he recognizes, like under the table, on the ceiling, on the couch, etc. Being able to recognize stuff is exciting for a two year old who is just getting a grasp on language.

Oh, another classic. My boy ADORES this book. It's an absolutely fantastic way to drill colors without your kid knowing what you're up to. :) Meanwhile, all the familiar animals make my child excited to keep turning pages.

My boy loves the entire series by Laura Numeroff. Again, it's the recognition thing. He loves being able to point out things he recognizes, like pancakes, taking a bath, and dancing that all happen in this book. He gets so excited, and I can totally use that recognition to my advantage. "Look, the pig is taking a bath! What letter does bath start with?" I ask him. "B!" he yells, jumping up and down. Using familiar words to drill letters is a great way to get todders interested in reading.

Short and sweet. This is the first book I ever bought for my child. In just a handful of pages, "The Little Engine That Could" by Piper Watty tells a wonderful story about how anything is possible if you believe in yourself. What a great lesson to teach your children.
And these are just the tip of the iceberg. There are SO many good books out there. What are your favorites? Why are they so good (aka what lessons do they brilliantly teach)? I'd love to hear some excellent tips for new books to try out. I bet with all of us, we can come up with a pretty fantastic list. :)
-Alyssa
Wednesday, August 3, 2011
When a calling is hard....
 *I was ward chorister and ward choir director (hence the picture) for 2 years in a previous ward several years ago. One of those callings I LOVED and would totally do again.
Sometimes you LOVE the callings you get.
Sometimes you are overwhelmed by a calling, but you learn so much and are grateful for the challenge and growth.
Sometimes you tolerate a calling, not really disliking or liking it.
Sometimes you dread your calling!
Please tell me I'm not the only one.
I would say I've had my fair share of each of these types of callings. In fact, in the last 2 years I've gone through all 4 of these feelings. :)
I've been serving in my ward in the same calling for the past year. It has been a very hard calling for me. There is only one other time that I can remember dreading a calling as much as this one. This calling was not only taxing and overwhelming, but I never got to the point where I actually liked it. That's hard!
I did my best with the calling and prayed a lot for guidance and help. I was very positive outwardly and only complained to a few of my friends and family. :) But still, I think if I'd had a better attitude it might have gone more smoothly. Either way, I made it through and I do feel like I did the best I could at the calling in light of the craziness that has been my life for the last 6 months.
Now that we are moving I will have another opportunity for a new calling - for which I'm very excited! I want to make it a better experience - despite whatever it turns out to be.
Here are some things I plan to do this time (and have done in the past).
- Pray (of course this is number one).
- Delegate IF the calling allows for it (I got really good at delegating due to my past two callings).
- Try not to stress out if things don't always go according to plan.
- Read more on LDS.org or the Ensign for ideas on how to improve.
- Be super positive.
~Tannie~
Monday, August 1, 2011
Benefits of a Birthing Class
Before I married my husband I knew I was interested in trying natural childbirth. When I got pregnant shortly after getting married, I knew that I wanted us to take birthing class together.
My husband was very reluctant. He didn't see the need to take a class on something as fundamental as giving birth. He was also enrolled in a maternity nursing class at the time and figured that a childbirth class would just be repeat of his college course. He even said it would be silly to pay for the same class twice.
After much persuading and explaining what I saw the benefits to be. he agreed to go to the first class.
We went to the first class where we sat in the instructor's living room on the floor with seven other couples. We sat for two hours listening to the instructor, asking questions and sharing experiences. I loved it! But I wasn't sure what my husband thought.
I nervously asked him, on our way back to the car, what he thought of the class. His response was simple, "Why didn't you tell me that this class was all about husband coached childbirth!" He was very excited to hear that this class was just as much, if not more, for him than me. He was excited to go to class with me every week after that for all 12 weeks.
Our birthing classes (yes, we have taken more than one class) prepared for the deliveries of our two children, helped us learn how to work together and has shaped, in a small part, to how we parent.
Let me explain. I will share the three main benefits, as I see them, of taking a birthing class.
#1 - To learn how to cope with the pain.
It is easy to read about and learn about relaxation techniques on your own, but come show time it is really hard to remember them. The more practice you get, with someone to guide you, the more likely you are to remember them. Remember: Dads need practice too! As moms-to-be we often read all the information out there on pregnancy and delivery, but not many dads I know do the same thing. A birthing class is a time for them to focus just on the upcoming labor and delivery without any distractions. They get a chance to learn what is coming and how to help you.
In class, you also learn how to deal with different scenarios. Coping with a long labor looks very different than coping with a fast labor. The mom has different needs and it helps dad to have an idea what to do to support the mom. Also, there are some techniques that can help lessen the pain if a mom is going through back labor.
Of course, you can learn techniques during labor from nurses, but wouldn't it be nice if you knew them beforehand so you could have them in your arsenal. The more tools you have at your disposal, the more prepared you will be for the expected and unexpected.
#2 - Birthing classes open a dialogue between you and your husband about your views on childbirth and parenting issues.
I loved taking classes with my husband because we were able to go to class together each week (our class was a 12 week course). My favorite part of the class was our car ride home. We discussed what had been covered in class. The class brought up topics that we had never thought to discuss, but because of the class we were able to talk about them and come to a consensus.
When I went into labor we were confident about our desires and knew how to communicate with each other because we had done so much preparation before.
Parenting issues (breastfeeding, co-sleeping, babywearing, vaccines, etc.) were also discussed in our different classes. I know that the topics we covered in our birthing classes have helped to shape our views on parenting. Not necessarily because the class told us what to do, but because the class provided a forum for those kinds of discussions.
#3 - Learning was is "normal" for labor and delivery empowers you and your husband to be advocates for you and your baby.
This is, to me, the most important benefit of a childbirthing class. If you know what is norml for labor and delivery, you are better able to play an active role in any decision making. YOU know your body better than anyone else. Labor is a natural process, but it helps to know what that natural process is supposed to look like. The more you know, the better able you are to make decisions.
In the end, this is YOUR baby and YOUR delivery. YOU need to be an active and informed participant in all decisions. Labor and delivery nurses do this day in and day out, but the day you deliver a baby is special to you. Please don't let them treat you like you are just a routine patient and they know better. No one knows better than you what is important to you.
I believe that childbirth classes are important for every couple. Even if you have kids, you can still learn. I learned more in our second class during our second pregnancy than I did in our first because I had a better idea of what to expect.
An article I read recently summed up the benefits that come from a quality childbirth class.
Labor and delivery can be scary. It is hard work. But, I truly, truly believe in the scripture that says
My husband was very reluctant. He didn't see the need to take a class on something as fundamental as giving birth. He was also enrolled in a maternity nursing class at the time and figured that a childbirth class would just be repeat of his college course. He even said it would be silly to pay for the same class twice.
After much persuading and explaining what I saw the benefits to be. he agreed to go to the first class.
We went to the first class where we sat in the instructor's living room on the floor with seven other couples. We sat for two hours listening to the instructor, asking questions and sharing experiences. I loved it! But I wasn't sure what my husband thought.
I nervously asked him, on our way back to the car, what he thought of the class. His response was simple, "Why didn't you tell me that this class was all about husband coached childbirth!" He was very excited to hear that this class was just as much, if not more, for him than me. He was excited to go to class with me every week after that for all 12 weeks.
Our birthing classes (yes, we have taken more than one class) prepared for the deliveries of our two children, helped us learn how to work together and has shaped, in a small part, to how we parent.
Let me explain. I will share the three main benefits, as I see them, of taking a birthing class.
#1 - To learn how to cope with the pain.
It is easy to read about and learn about relaxation techniques on your own, but come show time it is really hard to remember them. The more practice you get, with someone to guide you, the more likely you are to remember them. Remember: Dads need practice too! As moms-to-be we often read all the information out there on pregnancy and delivery, but not many dads I know do the same thing. A birthing class is a time for them to focus just on the upcoming labor and delivery without any distractions. They get a chance to learn what is coming and how to help you.
In class, you also learn how to deal with different scenarios. Coping with a long labor looks very different than coping with a fast labor. The mom has different needs and it helps dad to have an idea what to do to support the mom. Also, there are some techniques that can help lessen the pain if a mom is going through back labor.
Of course, you can learn techniques during labor from nurses, but wouldn't it be nice if you knew them beforehand so you could have them in your arsenal. The more tools you have at your disposal, the more prepared you will be for the expected and unexpected.
#2 - Birthing classes open a dialogue between you and your husband about your views on childbirth and parenting issues.
I loved taking classes with my husband because we were able to go to class together each week (our class was a 12 week course). My favorite part of the class was our car ride home. We discussed what had been covered in class. The class brought up topics that we had never thought to discuss, but because of the class we were able to talk about them and come to a consensus.
When I went into labor we were confident about our desires and knew how to communicate with each other because we had done so much preparation before.
Parenting issues (breastfeeding, co-sleeping, babywearing, vaccines, etc.) were also discussed in our different classes. I know that the topics we covered in our birthing classes have helped to shape our views on parenting. Not necessarily because the class told us what to do, but because the class provided a forum for those kinds of discussions.
#3 - Learning was is "normal" for labor and delivery empowers you and your husband to be advocates for you and your baby.
This is, to me, the most important benefit of a childbirthing class. If you know what is norml for labor and delivery, you are better able to play an active role in any decision making. YOU know your body better than anyone else. Labor is a natural process, but it helps to know what that natural process is supposed to look like. The more you know, the better able you are to make decisions.
In the end, this is YOUR baby and YOUR delivery. YOU need to be an active and informed participant in all decisions. Labor and delivery nurses do this day in and day out, but the day you deliver a baby is special to you. Please don't let them treat you like you are just a routine patient and they know better. No one knows better than you what is important to you.
I believe that childbirth classes are important for every couple. Even if you have kids, you can still learn. I learned more in our second class during our second pregnancy than I did in our first because I had a better idea of what to expect.
An article I read recently summed up the benefits that come from a quality childbirth class.
Is birth actually something you can "prepare" for? A really good class will help give you the knowledge you need to make informed decisions, help you keep an open mind, prepare for the unpredictable, and give you a number of tools to pull out depending on how you feel at the time. Because what you need more than anything, going into your birth, is permission to react to the situation in the way you, personally, see fit at the time — not what Dr. Lamaze, Dr. Bradley, your yoga teacher, the Church of Scientology, the lady down the street or any other childbirth instructor believes is best.
Labor and delivery can be scary. It is hard work. But, I truly, truly believe in the scripture that says
"If ye are prepared ye shall not fear." (D&C 38:30)
~Lisa~
Subscribe to:
Posts (Atom)