
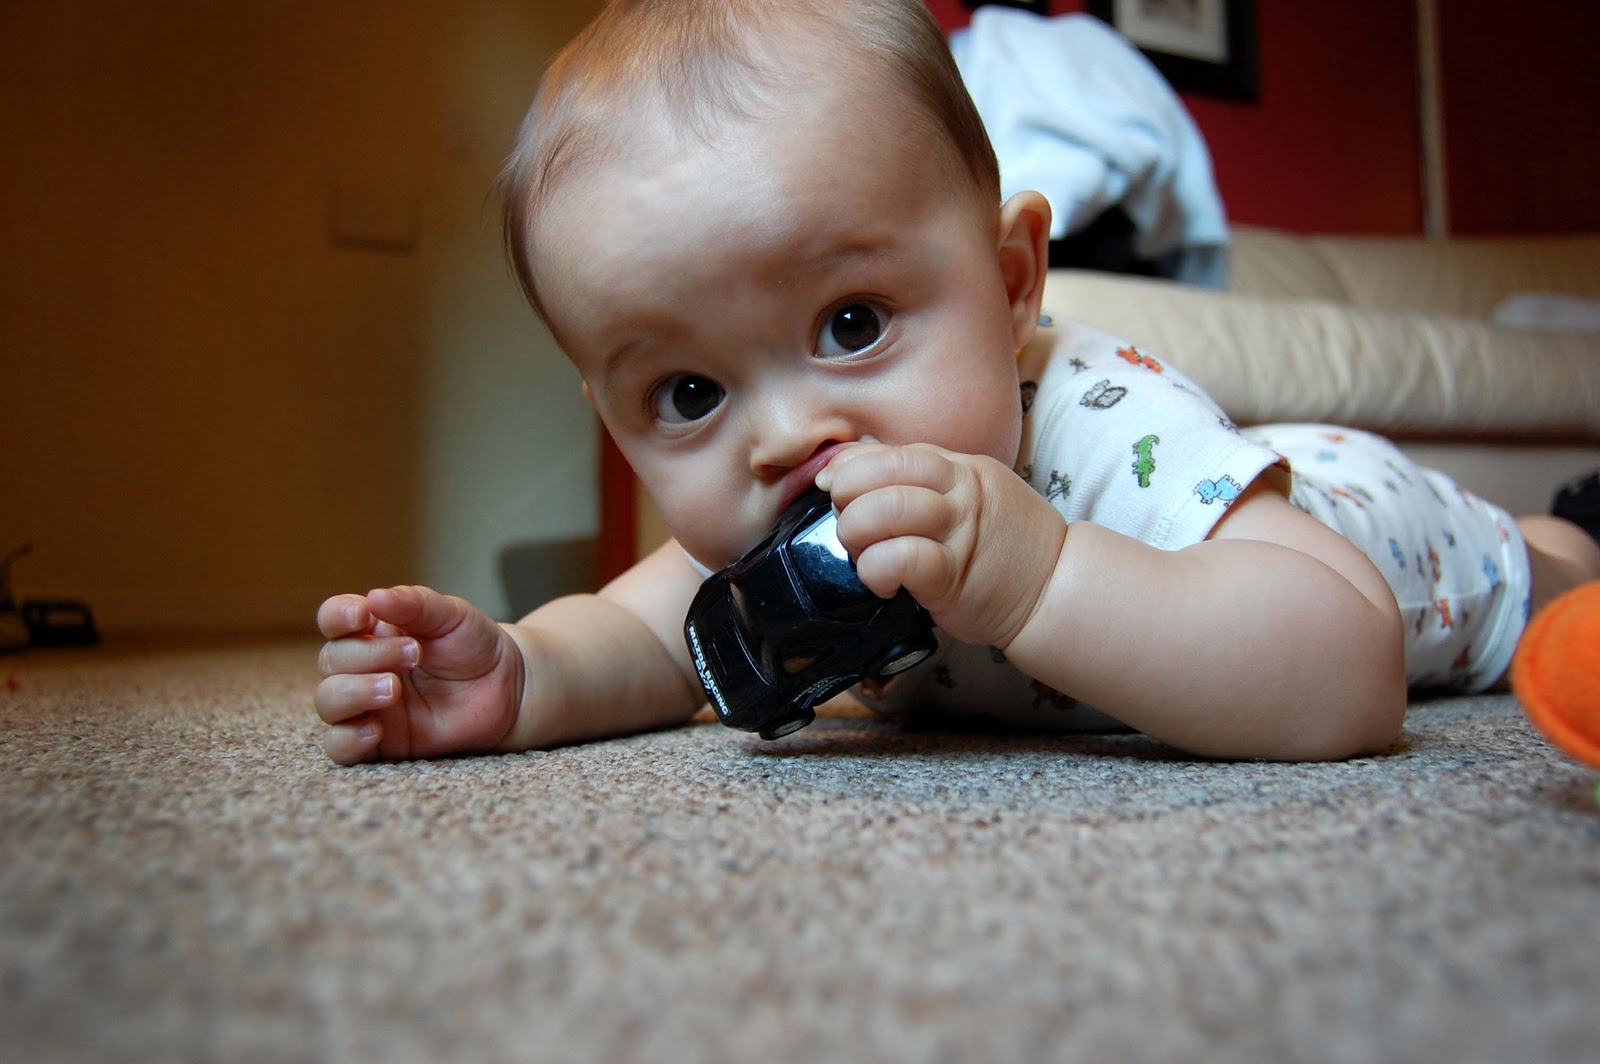
That's my boy almost two years ago. Isn't he cute? (Just nod your head.)
Let's be frank. We love our kids. Love em' to death. And if you're like me, you can hardly resist taking about A MILLION pictures of these little cuties and posting them for the whole blogosphere to see...but what's the secret to getting these precious pictures to turn out? I mean, we want to adequately portray the maximum level of cutness for all our friends to see, right?
My background: I graduated two years ago with a bachelor in fine arts, emphasis in painting and drawing. Not photography. But training in photography was part of my degree, and in the scant two years I've been a mom, I've taken A LOT of pictures. Think tens of thousands, including all my boy's milestone pictures (because paying a studio for them is dang expensive) and a few family picture sessions here and there for friends. Here's what I've learned...(NOTE: These tips are geared toward beginning photographers with limited access to photography equipment.)
A. LIGHT: When your camera takes a picture, it essentially just makes a record of the light in the room. No light = no pictures. The essence of this idea makes sense. If there's no light, you can't possibly see anything, and neither can your camera. The same is true for poor lighting. Poor light = poor pictures...like the light that comes from all our light bulbs. Everyday light bulb lighting stinks. That's just how it is. Remember back when you were little and spent all afternoon playing outside? When you came inside, the house felt DARK, right? Well, your camera thinks so too. That's why indoor photography studios always have those big, expensive lights that practically blind you. So, if you don't have access to a studio, (like 99.999999999 percent of everyone...including me) there's two things you can do:
1) Take pictures by windows. For beginning photographers without expensive camera equipment, natural light is your best friend. Please, TURN OFF YOUR FLASH and make use of window light to avoid the deer-in-the-headlights full-frontal flash that completely washes out faces and makes good photos hard to take. Especially when taking portraits, I try and avoid using my flash like the plague. Don't have windows everywhere? I have that problem too. There's just some rooms in my house that I don't take pictures in. The downsides of turning off your flash is that you'll have less light to work with, which often means blurry pictures. Help avoid blurry pics by steadying the camera against a wall or the floor, prop it up on something non-moving like books or a bag of beans, or use a tripod.
2) Go outside. The best times to shoot are early in the morning or later in the evening (try to avoid the 2:00-directly overhead sunlight). The best weather to shoot in is a cloudy day. If it's sunny outside, try shooting in the shade. We're aiming for soft light, not the harsh stuff that leaves funky shadows on your child's face.

B. PERSPECTIVE: Get down at eye level with your child. Some of the best pictures I've taken have been with the camera down at my hip or on the ground, snapping pictures from a baby's eye view.

C. TEXTURE: Remember seeing all those adorable newborn pics where the baby is wearing chunky, knitted hats or sitting in fuzzy fur? There's a reason photographers do that. Different textures create interest in your photos. Dress your child in handmade knits, big ruffles, multiple layers, and different patterned fabric. Set them against highly textured backdrops like old brick walls, weathered fences with peeling paint, wheat fields, old buildings, etc. Where are these locations? It's different for every city, but try driving around a bit. Some of my favorite shooting-spots have been in small, downtown side streets or alleys that don't get as much attention, so the bricks look weathered, the paint looks old, and the metal has started to rust. Ah. Beautiful.

D. FREQUENCY: My photography professor once told me about this amazing pro-photographer who had a success ratio of about 1:20. Meaning, out of every 20 pictures he took, one would turn out good enough to keep. I'm not nearly that good. My success ratio is about 1:40. I delete the other 39. That's the beauty of the digital age. Take A LOT of pictures...from all different angles and zooms, especially when your subject matter is kids. You never know what they'll do in front of the lens.
E. EDITING: When done well, picture software editing can do wonders to enhance your photos. There's free programs like Gimp or Picasa out there, but I'm a personal fan of Adobe Photoshop. Yes, I know it's expensive, but worth it in my opinion. There's just some tools in Photoshop that other programs don't offer. (Try out a free trial at http://www.adobe.com/downloads/. It lasts for a month, so if you're new to Photoshop, it's a great place to get a feel for it. I'd recommend starting with Elements 9 (the more basic package) and moving onto the CS5 trial (same tools as Elements, but with a lot more "stuff" added). You can always purchase older versions like Elements 8 or CS3 online for much less money than more recent releases.) I wish I could give more specific tips, but the best I can say it just to try out the software for yourself. You learn as you go. If you have any specific questions, please post them in the comments section. I'll do what I can to answer them.
NOTE: If it's your very first round into into photo-editing, I recommend saving a copy of the original picture in another file. Keep it safe. I had a lot of mess ups in the beginning and wished I had a back-up copy of the original to go back to.

(Ah! His chubby cheeks kill me. It's a good thing I'm having another baby soon, otherwise these old photos might just do me in.)
And that's a very basic intro into kiddo-portrait photography. The tips have obviously been skewed towards infant and toddler photography, since my boy's only two and a half, but everything written above is easily adapted to taking pics of older children as well. Now the stage is yours. What are your favorite kid-photo-taking tips and insights? Do you have any specific questions? If you have one, where are your favorite locations to shoot in your city? Let's hear it, my friends!
-Alyssa
7 comments:
For the record, my favorite places to shoot in Logan, UT are all the little alleys between buildings on Main Street, specifically on 100 and 200 North.
thanks!
I love going up to USU around all the old buildings and architecture up there. I don't know all the lingo of photography but I have learned over the years a lot of the things you mentioned in your post today. I would love to learn more though. And locations. I always love when someone informs you of a good location to shoot at. Moving to Salt Lake is going to offer a whole new battle field.
I find it easier to get "action" shots of my kids, like playing on a playground. They get really antsy really fast if we're trying to pose, and often their faces come out looking...weird. They stay entertained a lot longer if they can play while I'm taking pictures, and I then have a lot more time to mess up in hopes of getting the really good shots. :)
And this may be a no-brainer, but I suggest avoiding super busy prints on your kids' clothes (shirts in particular) when you're taking pictures. They get distracting and can take the focus away from your child's adorable face.
My question for Alyssa: What kinds of things do you generally "fix" when you're editing photographs? My husband actually owns Photoshop already and I've played around with it some, but I really have no idea what I'd even change on something. Any tips on where to start?
Laura: Good question! Here's what I generally do:
CROP: That's kind of self explanatory. Just cuts off the extra stuff.
LIGHTS AND DARKS: There's different "quirks" to every digital camera. For example, mine is a Nikon D40, and that camera is notorious for having a white balance that's a little "off", which just means that I have to slightly darken the darks on all my photos. A good way to check and see if the light-dark contrast is good on a photo is to turn it black and and white. If it looks okay in B&W, then I just leave it. If it looks a little washed out, then it's a good indication that you need to play with the CONTRAST or light CURVES that can be found in the "image" tab on the top bar. You can also manually lighten and darken specific spots using the BURN TOOL (to darken) or DODGE TOOL (to lighten) that can be found about halfway down on your side-tool bar. Just hover the clicker over each one, a little pop-up bubble should tell you what they are. I use burn/dodge to subtly play up areas I want to draw more attention to, like hair, face, etc.
You can also run a more generic "AUTO CONTRAST" that's also in the "image" tab.
FILTERS: Especially if you don't use the flash, your camera picks up on all sorts of light distortions. For example, shady pics often turn out a little blue-ish. Indoor pictures often turn out tinged orange-ish. If you don't have a filter on your lens, the "filter" tab on the top bar of Photoshop will help you manually change these color distortions after the pics are taken.
FIXING BLEMISHES: So, our kids are perfect, right? We all know that. But that doesn't stop a stray string of drool or a runny nose from making its way into some of my pictures. I fix it by using the PATCH tool on the side bar (about a fourth of the way down, looks like a patch). Photoshop's patch tool is AWESOME. You can select the area you want to cover up (like right under the lip), drag it to a patch of skin you want copied, and then Photoshop will automatically blend the patch right in. Can't even tell anything was there.
For most of my home-pictures, that's about the extent I do. I'm busy and don't have time to spend 20 minutes per photo like I often do for paid-photo sessions. For those, I do a lot more with layers and such, but unless there's some interest to get into more complicated stuff now, I'll leave that for another tutorial. :)
When I feel lazy, which is quite often these days since I'm super pregnant, I also do a lot of batch editing. Makes editing SO much easier. First you create an ACTION, which basically just records what edits you've done to a specific photo and consolidates it into a single command. You can run it manually on additional photos by clicking the "play" button, but BATCH EDITING allows you to run your action on multiple photos at once. Saves SO much time.
Here's a good link that explains it:
http://www.creativemac.com/2002/04_apr/tutorials/psbatch.htm
Thanks for the tips!! :) I don't know a lot about photography but I do LOVE playing around in Photoshop (I have photoshop elements 9) and editing pictures. There is an awesome website that offers FREE Photoshop Actions that you download and she also gives a tutorial on how to use them. It's so fun!!! Here's the link for those interested:
http://www.thecoffeeshopblog.com/
go to her "actions and presets" tab for the free downloads. She also explains how to download and install the actions.
Post a Comment